The Problem:-One can receive messeages in a wifi hotspot,like the airport;but can not send messages through the Outlook Express.
Reason:-Some public wifi systems block port 25 to reduce SMTP traffic and prevent unauthorised use such as sending spam,as a result the user can't send the messages.
Resolution:-One should check with the wifi provider that they allow port 25 traffic.
Monday, October 24, 2005
Wednesday, October 19, 2005
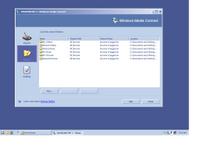
Windows Media Connect-How to start sharing a folder
What is Windows Media Connect?
It is a software which helps to stream the music, video, and picture files on your computer to the digital media receivers (DMRs) that are connected to your home network.
By default, Windows Media Connect automatically shares the folders My Music, My Pictures, and My Videos. You can use the following procedure to change which folders you want to share.So before starting the operation,you must select the folders that you want to share.
Steps:-
1]Click Start>click All Programs, and then click Windows Media Connect.
2]Click Sharing, and then click Add.
3]Click Browse to choose the folder that you want to share.
4]Select any one of the two choices:-
If you wish all of your DMRs to be able to play the items in this folder, click Make this content available to all devices.
If you want only some of your DMRs to be able to play the items in this folder, click Make this content available only to the selected devices below, and then select which devices you want to have access to the folder.
Download:-You can download Windows Media Connect from the Microsoft Download Center.
It is a software which helps to stream the music, video, and picture files on your computer to the digital media receivers (DMRs) that are connected to your home network.
By default, Windows Media Connect automatically shares the folders My Music, My Pictures, and My Videos. You can use the following procedure to change which folders you want to share.So before starting the operation,you must select the folders that you want to share.
Steps:-
1]Click Start>click All Programs, and then click Windows Media Connect.
2]Click Sharing, and then click Add.
3]Click Browse to choose the folder that you want to share.
4]Select any one of the two choices:-
If you wish all of your DMRs to be able to play the items in this folder, click Make this content available to all devices.
If you want only some of your DMRs to be able to play the items in this folder, click Make this content available only to the selected devices below, and then select which devices you want to have access to the folder.

Download:-You can download Windows Media Connect from the Microsoft Download Center.
Tuesday, October 18, 2005
How to force activation in Vista
To force activation in Windows Vista,build 5112:-
Start>Run >Type in: licenseui >OK
To force activation in Windows Vista,build 5219:-
Start>Run>Type in: slui.exe >OK.
Start>Run >Type in: licenseui >OK
To force activation in Windows Vista,build 5219:-
Start>Run>Type in: slui.exe >OK.
Sunday, October 16, 2005
How To Use SyncToy
Here are the simple steps to configure SyncToy:-
1]First select Create New Folder Pair.
2]There are two folders-left and right. The Left Folder is the source folder where as the Right Folder is the target Folder.
3]Either type a folder name into the text box or select Browse and navigate to find the left or source folder for the folder pair.
4]Select the folder, Ok and Click Next.
5]Select Browse and navigate to find the right or target folder for the folder pair. Click OK and Next.
6]Next you will get five options:-Synchronize,Echo,Subscribe,Contribute and Combine.
Synchronize: New and updated files are copied both ways. Renames and deletes on either side are repeated on the other.
Echo: New and updated files are copied left to right. Renames and deletes on the left are repeated on the right.
Subscribe: Updated files on the right are copied to the left if the file name already exists on the left.
Contribute: New and updated files are copied left to right. Renames on the left are repeated on the right. No deletions.
Combine: New and updated files are copied both ways. Nothing happens to renamed and deleted files.
7]Select the first radio button i.e. Synchronize.
8]Enter a name for your folder pair. The name can be up to 255 characters long, and must be different from your other folder pair names.
9]You can now Preview or,Run.
10]Create another folder pair, and/or Delete the folder pair you just created.
11]Close the confirmation screen
How To Install SyncToy
What is a SyncToy?
It's a free download on the Microsoft Download Center which helps to synchronizes the files in folders of your choosing. It does so by copying, renaming, and deleting files.
Why SyncToy?
Because this utility, however, allows you to specify pairs of folders that the program automatically keeps in sync. You can configure the details, but basically anything that you do in one folder will automatically be done in the other folder, even if it's on a USB drive, or other portable storage device.
How to Install?
1]Download and install SyncToy V.1.0.0.4 ;from the Microsoft Download Center:-http://tinyurl.com/aclro
2]Accept the Licence Agreement.
3]Select the location where it will be installed.The default location is C:\Program Files\Microsoft\SyncToy4]you will get two options:-a]Everyone and b] Just me.So choose according to your need.
5]Click "Next" to start installation on the Comfirm Installation Wizard.
6]Wait for a few seconds to complete the installation.
7]Click "Close" to exit.
Registration Wizard Error
The Problem:-When you try to run the registration wizard for registering Windows,you get the following error:-
There is no dial tone. Make sure your phone line is properly connected to the modem.
Why does it happen?
It happens if there is a problem in Regwiz.exe
Resolution:-
Click Start,Run and type in regwiz /r and click Ok
Note:-If you have an OEM version then you have to contact the OEM supplier.
There is no dial tone. Make sure your phone line is properly connected to the modem.
Why does it happen?
It happens if there is a problem in Regwiz.exe
Resolution:-
Click Start,Run and type in regwiz /r and click Ok
Note:-If you have an OEM version then you have to contact the OEM supplier.
Sunday, October 09, 2005
Windows Media Player10 refuses to go to the Full Screen mode
The problem:- WMP10 is refusing to go into Fullscreen mode. It momentarily goes black with a little window in the top left hand corner then reopens.
The Resolution:-To solve the above problem,do the following:-
Open WMP,click Tools,click Options,click Performance tab,click Advanced now,Clear the Enable full-screen mode switch click ok.
The Resolution:-To solve the above problem,do the following:-
Open WMP,click Tools,click Options,click Performance tab,click Advanced now,Clear the Enable full-screen mode switch click ok.
Saturday, October 08, 2005
Device Manager:- Snap In Creation Failed

The Problem:-When you try to acces the device manager you get the following error (see the picture):-
The Resolution:-Login as the Administrator or,who has the administrative rights.Then Click Start,click Run and type regsvr32 devmgr.dll click ok.
Web Page Printing-Not printing the whole thing
The Problem:- If you want to print the whole website, but when you click print, all it does is print the main stuff, not the theme/ background stuff.
The Resolution:- Open IE>Tools>Internet Options>Advanced>Scroll down through the option until you see "Printing". Now, check "Print background colors and images" and press "OK" to close the dialog box.
The Resolution:- Open IE>Tools>Internet Options>Advanced>Scroll down through the option until you see "Printing". Now, check "Print background colors and images" and press "OK" to close the dialog box.
Windows File Protection: Files that are required for windows to run properly have been replaced by unknown versions..
The Problem:-When you start your computer you get the following error:-
Windows File Protection: Files that are required for windows to run properly have been replaced by unknown versions; Windows needs to restore these files to function properly.
The Cause:-It happens if there is VX2 malicious program variants.It's an Adaware.More information can be obtained here:-
http://www.spywareguide.com/product_show.php?id=25
Resolution:-Scan the system with the latest version of Adaware,run that in Safe mode.The manual removal has been described in details here:-
http://www.spywareguide.com/product_show.php?id=25
And then:-
Start>click Run>type regsvr32 initpki.dll>and then click OK.
This will register the Initpki.dll file.
Further reference:-
http://support.microsoft.com/?kbid=904677
Floppy Drive Access Denied
The Problem:-When you insert floppy disk in the floppy drive you get an an access denied message.
The Resolution:- Did you create the floppy? If then see:-
How to take ownership of a file or folder in Windows XP
http://support.microsoft.com/?kbid=308421
I shall also suggest you to check the registry settings:-
Start>Run>Regedit>ok Now navigate to the following key:-
HKEY_LOCAL_MACHINE\SOFTWARE\Microsoft\Windows NT\CurrentVersion\Winlogon
Highlight Winlogon and in the right pane look for "allocatefloppies"
Check the registry values:-
"0"= Administrators in the domain can gain access to data on the floppy disks in the floppy disk drive.
"1"=Only the user logged on locally can gain access to data on the floppy disks in the floppy disk drive
Thursday, October 06, 2005
Very Handy System Configuration Utility

MSCONFIG tool will let you set how to startup your machine. Very nice and easy way to diagnose problems on your Windows XP machine.
To start the System Configuration utility, click Start, click Run, type msconfig in the Open box, and then click OK.
So far there were six tabs in the System Configuration Utility.These include :-General,SYSTEM.INI,WIN.INI,BOOT.INI,Services,and Startup
Now on the 5th October,2005,a new update (WindowsXP-KB906569-v2-x86-ENU.exe)has been launched by Microsoft which includes a Tools tab to the System Configuration Utility.This tab covers:-
About Windows
Command Prompt
Event Viewer
Internet Options
Internet protocol configuration
Network Diagnostics
Programs
Registry Editor
Security Center
System Information
System Properties
System Restore
Task Manager
Not only that it is also showing the complete path of each diagnostic tools.So by just typing msconfig you are getting all your necessay things.
Download: Update for Windows XP (KB906569) .After installation it didn't ask me to reboot.
Monday, October 03, 2005
BootVis.Exe Does it really fast booting up?
No.It doesn't.But many have a wrong idea that this tool improves booting time.Infact the Bootvis.exe tool is no longer available from Microsoft site.
The question comes what does this tool really do?
Bootvis.exe displays various time-interlocked graphs showing such things as CPU Usage, Disk I/O, Driver Delays and resume activity. Bootvis.exe can show many types of useful details; the best way to start is by dragging an area on the graph and either double-clicking it or right-clicking to use the context menu to see what options are available. The operating system instrumentation starts about one second after the boot loader loads. Overall boot time shown in Bootvis.exe should add BIOS power-on self test (POST) time + one second. Taking boot traces with Driver Delays will lengthen boot by two to three seconds. The resulting binary file will be several megabytes in size.
But remember Bootvis.exe is not a tool that will improve boot/resume performance for end users. On the other hand there are reports that Bootvis.exe cannot reduce or alter a system's boot or resume performance. The boot optimization routines invoked by Bootvis.exe are built into Windows XP. These routines run automatically at pre-determined times as part of the normal operation of the operating system.
Reference:-fast boot and fast resume
So What's the normal booting times?
According to Microsoft:-
The design goals for Windows XP on a typical consumer PC are:
•Boot to a useable state in a total of 30 seconds
•Resume from Hibernate (S4) in a total of 20 seconds
•Resume from Standby (S3) in a total of 5 seconds
Boot and resume times are measured from the time the power switch is pressed to being able to start a program from a desktop shortcut.
So to isolate the problem which is making a slow boot see:-
How to Troubleshoot By Using the Msconfig Utility in Windows XP [Q310560]
http://support.microsoft.com/?kbid=310560
HOW TO: Perform Advanced Clean-Boot Troubleshooting in Windows XP
http://support.microsoft.com/?kbid=316434
If you still want to get this tool:-
The Bootvis.exe tool is no longer available from Microsoft site.
Other download Sites:-
MajorGeeks TX - USA MajorGeeks TX - USA MajorGeeks GA - USA MajorGeeks FL - USA MajorGeeks EU
"All Programs "Option missing on the start menu
Resolution:-
If you use Windows XP in Classic Style,you won't get the "All Programs" option.
If you use Windows XP in Classic Style,you won't get the "All Programs" option.
Putting a program into the Start>All Programs list
Here are the simple steps on how to:-
1]Left click on a shortcut to the program
2]Drag it to the start button--keep holding down the left mouse button while you hover over the start button and the start panel will open--keep holding while hovering over all programs until the list opens.
3]Drag the shortcut to your preferred location in all programs list and drop it there.
"All Programs" Menu missing
The Problem:-
When you Click Start button and navigate to "All Programs",you find the menu is missing.
Resolution:-
Start>Run>Regedit>ok
Now navigate to the following keys:-
HKEY CURRENT USER\Software\Microsoft\Windows\CurrentVersion\Explorer\User Shell FoldersSet Start Menu value to "%USERPROFILE%\Start Menu"
HKEY LOCAL MACHINE\Software\Microsoft\Windows\CurrentVersion\Explorer\User Shell Folders Set Common Start Menu value to "%ALLUSERSPROFILE%\Start Menu"
Close the registry editor and restart the machine.
If you find the above process is difficult then you may try this direct registry edit:- 'Remove "All Programs" from Start Menu - Undo'
line 154 http://www.kellys-korner-xp.com/xp_tweaks.htm
Removing Startup Items
One can prevent specific items from starting up by unchecking them in the System Configuration Utility.
Start>Run>msconfig>ok Uncheck the item which is listed under the Startup tab>Apply/ok>Reboot.
To remove from the registry source:-
Start>RunRegedit>ok
Access the common registry locations of these items take a look in the following areas:- HKEY_LOCAL_MACHINE\SOFTWARE\Microsoft\Windows\CurrentVersion\Run HKEY_LOCAL_MACHINE\SOFTWARE\Microsoft\Windows\CurrentVersion\RunOnce HKEY_CURRENT_USER\Software\Microsoft\Windows\CurrentVersion\Run HKEY_CURRENT_USER\Software\Microsoft\Windows\CurrentVersion\RunOnce
If you have disabled items in the System Configuration Utility and would like to remove them from the registry also they can be found in one of the following locations:-
HKEY_LOCAL_MACHINE\SOFTWARE\Microsoft\SharedTools\MSConfig\startupfolder HKEY_LOCAL_MACHINE\SOFTWARE\Microsoft\Shared Tools\MSConfig\startupreg
Sunday, October 02, 2005
Second Hard Disk making Computer Slow
The Problem:-After installing a second hard disk in my computer as slave and it has started running slower.
Cause:-This happens if the drive is in PIO mode or,if the cabling is incorrect.
Resolution:-
Open Control Panel>System
1Open Device Manager.
2.Double-click IDE ATA/ATAPI Controllers to display the list of controllers and channels.
3.Right-click the icon for the channel to which the device is connected, select Properties, and then click the Advanced Settings tab.
4.In the Current Transfer Mode drop-down box, select DMA if Available if the current setting is "PIO Only."
Also Check the cabling is correct (And a master drive should be on the end connector - any slave in the middle). Now in Device Manager, select the master controller - just above Primary Channel and Action; Uninstall. Then OK, reboot for PnP to try over.
Saturday, October 01, 2005
How To Create A Briefcase
Start>Run>Type in the following command:-
rundll32 syncui.dll,Briefcase_Create and press the Enter Key or;OK button.It will create a Briefcase folder on the Desktop.
More information on Briefcase here:-
How To Use the Briefcase Feature in Windows XP
http://support.microsoft.com/default.aspx?scid=kb;en-us;307885&sd=tech
rundll32 syncui.dll,Briefcase_Create and press the Enter Key or;OK button.It will create a Briefcase folder on the Desktop.
More information on Briefcase here:-
How To Use the Briefcase Feature in Windows XP
http://support.microsoft.com/default.aspx?scid=kb;en-us;307885&sd=tech
Subscribe to:
Posts (Atom)